1. CourseEra
2. edX
3. Khan Academy
4. Udemy
5. iTunesU Free Courses
6. MIT OpenCourseWare
7. Stanford Online
8. Codecademy
9. Open Culture Online Courses
10. TED-ed
Blog Page 31
Top 10 Sites For Free Online Education
Hᴏᴡ Tᴏ Gᴇᴛ 2 weeks VPS/RDP in free
Sᴛᴇᴘs :link:
1:- Rᴇɢɪsᴛᴇʀ ʜᴇʀᴇ :- https://en.upcloud.com/
2:- ꜰɪʟʟ ᴀʟʟ Fɪᴇʟᴅs ( ɪɴᴄʟᴜᴅᴇᴅ Tᴇʟᴇᴘʜᴏɴ Nᴜᴍʙᴇʀ)
3:- Vᴇʀɪꜰʏ ᴛʜᴇ ᴇᴍᴀɪʟ + ᴛʜᴇ Tᴇʟᴇᴘʜᴏɴᴇ Nᴜᴍʙᴇʀ
4:- Gᴏ ᴛᴏ Dᴀsʜʙᴏᴀʀᴅ, ᴀɴᴅ ᴄʟɪᴄᴋ ‘Dᴇᴘʟᴏʏ ɴᴇᴡ Sᴇʀᴠᴇʀ’
5:- Cʜᴏᴏsᴇ OS ᴀɴᴅ ᴛʜᴇ Lᴏᴄᴀᴛɪᴏɴ
6:- ɪᴛ ᴡɪʟʟ ᴀsᴋ ᴄᴀʀᴅ ᴅᴇᴛᴀɪʟs ꜰᴏʀ ᴛʀᴀɪʟ sᴏ ɢɪᴠᴇ ᴜʀ Vɪʀᴛᴜᴀʟ ᴄᴀʀᴅ ᴅᴇᴛᴀɪʟs ᴏʀ ᴛʀʏ ᴡɪᴛʜ ɢᴇɴᴇʀᴀᴛᴇᴅ ᴄᴄ
7:- Yᴏᴜ’ʟʟ ɢᴇᴛ ᴛʜᴇ VPS/RDP 🙂
How To Check Credit Card
1. Go To https://www.niteflirt.com
2. Create Account With Fake Information,
3. Now Go To Add Credit.
4. Type Your Credit Card Information
5. Type Billing Address As Credit Card Holder’s Info.
6. Select Credit Card Type.
7. Now Add Value (1-5$) How Much U Want To Add In Account.
8. Next Step If Card Is Valid, It Going To Add Credit On Your Account Enjoy,
How to Move Emails from One Gmail Account to Another
The method is just simple and straight and you will use some of Gmail account settings that will allow you to transfer all the email to another account. And this is a feature of Gmail that probably no one of you was knowing before reading this guide. So follow up some simple steps below.
:recycle:Steps To Enable POP In Old Email Account To Import Mails To New Account:
1. First of all login into your Gmail account whose email you want to move to another account.
2. Now click on settings button there on below of your profile picture of your account.1
3. Now under settings click on Forwarding and POP/IMAP option and there enable Enable POP for all mail (even mail that’s already been downloaded).
4. At below select Mark Gmail Copy As Read in the drop down option and then simply click on save changes option.
5. Now visit your new Gmail account to which you want to get all your mails.
6. There click on Settings and under it click on Accounts and Import and there select Add a POP3 mail account you own,
7. Now a popup windows will appears where you need to enter the email address from which you want to import emails and then click on next step.
8. Now on the another page simply proceed by entering the password and all other fields will be auto filled there and simply click on Add account.
9. Now on the next screen simply click on yes option and click on add.
10. Thats it you are done, now all the emails of that account will be there in your new Gmail account.
DSTV FREE Premium Tutorial beginner
STEPS::
1.Make Sure You have A DSTV Decoder(it must not be paid and it must be off when doing this Process)
2. Go to https://now.dstv.com( use Desktop or PC to do this and use Firefox or Chrome browsers)
3.make an account but don’t attach the Card (click on “I don’t have a decoder”)
4.Confirm everything and make sure the Two Channels are working.
5.now click on “Upgrade or Attach Card”
6.the Add your unpaid Card
7.After that Sign out for Two hours then sign in Again
8.Then you will see the catch up series and TV shows
9.Click on TV Guide And Select Package to Premium
10.go back to home and Click on Live TV and you will see Premium channels will appear click on Channel 100 and Watch for 3 minutes
11.after watching for Three minutes go to channel 110 and if you see it has started playing just play it for 30 minutes..
12.Switch your Decoder on and Try channel 110 if you see it’s playing then you are successful!!!!
How To Receive All Your Android SMS On PC
Many of you works on your PC for a long and at that it looks quite difficult to pickup android and read out every SMS received on it.
:small_blue_diamond: Mostly when you device is on charging and you working at distance from it
:small_blue_diamond:Steps To Get All Your Android SMS On PC:-
1. First of all download and install app Mighty Text in your android device.
2. Now in your Google Chrome browser add the extension Mighty Text.
3. Now open the app you will need an initial pair up with your PC as it will be done over wifi network on which both the devices being connected.
4. Now when you setup is done now you will see your android name on the icon when you click on it.
5. Thats it all done, now when you android receive any SMS it will transfer on your extension of PC and you can read it there.
Reset Forgotten Windows 10 / 8 / 7 Password

Whether you are locked out of your own computer or need to help a friend or family member who forgot their Windows password, there could be times when you need to reset a lost Windows password. It’s quite easy to do if you have a bootable disk like PCUnlocker. This tutorial will walk you through the process of making a PCUnlocker Live CD, and booting your PC from CD to reset forgotten Windows 10 / 8 / 7 password easily.
Making Bootable PCUnlocker CD
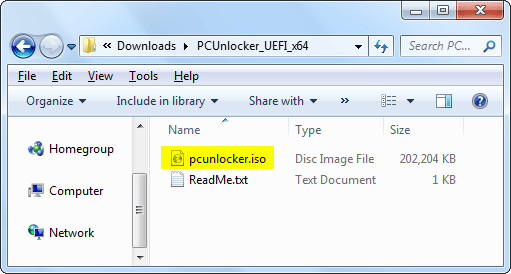
The first thing to do is download the ZIP file for PCUnlocker using another PC you can access. Next, extract the contents of the ZIP file to a folder on your hard disk. Open the extracted folder in Windows Explorer, and you’ll see an ISO file named pcunlocker.iso that you need to burn to a CD (or USB).
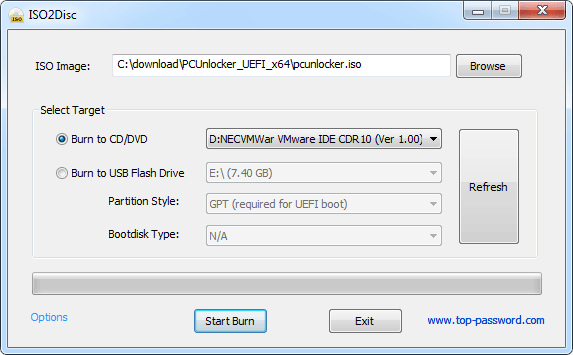
To make a bootable CD (or USB drive) from that ISO file, I’ll be using the freeware ISO2Disc. Insert a blank CD and open up ISO2Disc, navigate to the ISO file in the unzipped files. Choose the “Burn to CD/DVD” option and click on Start Burn.
This will create a bootable PCUnlocker CD in minutes. Note: If you don’t have a blank CD around, you can make a bootable USB of PCUnlocker instead.
Boot Your PC from CD
Once you have a bootable PCUnlocker CD, insert it into the computer whose password you want to reset. As soon as you turn on the computer, press a system defined key (such as F12, ESC, DEL, F2) to access BIOS. Go to the BOOT menu and set CD/DVD as first boot option.

After you’ve changed the boot priority, save the BIOS settings and restart your PC. It should now boot into PCUnlocker CD.
Reset Forgotten Windows Password
When you’ve booted to CD, PCUnlocker will find the Windows operating systems that were installed on your hard drive. Select one of your user accounts in the list, and click on Reset Password button to proceed.

This will open the Change Password dialog, letting you enter a new password or leave it blank to remove password. If you’ve chosen a local account that was connected to a Microsoft account, you’ll get the warning that the program will convert your Microsoft account back to local user.
Once you click OK, your Windows password will be reset immediately. Reboot your computer and reverse the changes you made to BIOS. You can then log back in to Windows with the new password!
PCUnlocker has three versions available for download – Standard, Pro and Enterprise. If you want to reset forgotten Windows password on a computer with UEFI secure boot turned on, you need to use PCUnlocker Enterprise.
Conclusion
PCUnlocker is simple enough for a first time user yet powerful enough for experienced expert. Even if you haven’t forgotten your Windows password now, I recommend making a bootable PCUnlocker CD that you can use in emergency cases.
100% Working way to Recover Deleted File 2019

Losing files is upset. Every now and then, we go through unfortunate situations. One such situation is accidental deletion of your important file. It could be a document, image or a video. Regardless of what type of file you have just lost, nothing is harder for the best free data recovery software – EaseUS.
Remember, there is a difference between restoring files from recycle bin and recovering data after permanent deletion. EaseUS software has ability to even restore those files that got deleted when you clicked on empty recycle bin.
Let us tell you, there are numerous paid and data recovery software solutions available in the market. If you are a first timer, then you might want a tool that provides its services for free, which is quite a good deal. This is because you want to check the software skills before using it. How can you identify which one is the best software till you give it a try. Therefore, you must check it before putting your hard-earned money into it. Also, you should be seeking out for a tool that’s easy-to-use rather than trouble-to-use.
How EaseUS data recovery software works?
As soon as you open the EaseUS Data Recovery software, the screen will show you all drives including hard drives and external drives. Being the prominent provider of enjoyable user experience, EaseUS performs unbelievably fast scanning of hard drives and other storage devices, and restores all data back through its quick scan.
After scanning, deleted files will appear in front of you. This will give users an opportunity to select the file which they lost accidentally. At this stage, user may browse the file name by typing the file name or if you can’t remind of that file name, you can always search for files by their format.
Select the required file and then press recover button. While restoring the files back, make sure to save it on a different partition. This would prevent you to replace the old information with the new one. The software gives full control over which data to retrieve and where the data should be located.
EaseUS free data recovery options are wrapped up into an advanced UI that is quite simple, as well as responsive. It makes sure you get all your recovered data promptly.
Once the data restoration gets completed, the software will notify you about it. Hence, it’s quite possible to retrieve your files back after emptying recycle bin, but you are required to take these few factors into account.
Never install this software in the same drive you aim to get the deleted files back from. Or else, the software will erase your deleted file.
Ensure to keep all your drives untouched and do not copy paste anything.
Verdict
So, easy you can lose your important data, it’s easy to get them back with EaseUS free data recovery software. EaseUS Data Recovery Wizard has ability to deliver awesome results. Good news for all ,here is the 50% off discount for you.
Tech event calendar 2019: Upcoming shows, conferences and IT expos

Our sort-able chart offers information, dates and locations for a variety of IT-focused events coming up over the next year.
Tech Events
This story, “Tech event calendar 2019: Upcoming shows, conferences and IT expos” was originally published by Computerworld.
Computer Tips & Tricks Everyone Should Know

General Tricks
Bring back a closed tab We have dedicated a section to web browsing further down below, but this one is too useful to be missed. Accidentally closed a tab? Simply press Ctrl + Shift + T to reopen the most recently closed tab and get back to what you were doing (Cmd + Shift + T on Macs).
Window snapping and multiple monitor control Pressing the Windows Key + Arrow Keys will cause a window to quickly snap to each side of either monitor. Alternatively, hitting Shift + Windows Key + Arrows will cause the window to jump to the other monitor. While pressing Windows + P will allow you to quickly set up a second display or projector.
As mentioned before, in macOS we favor leveraging the power of Mission Control to handle virtual desktops, switching between apps, and peaking at your desktop beautifully. Though Macs don’t support window snapping out of the box, a $0.99 app called Magnet comes highly recommended.
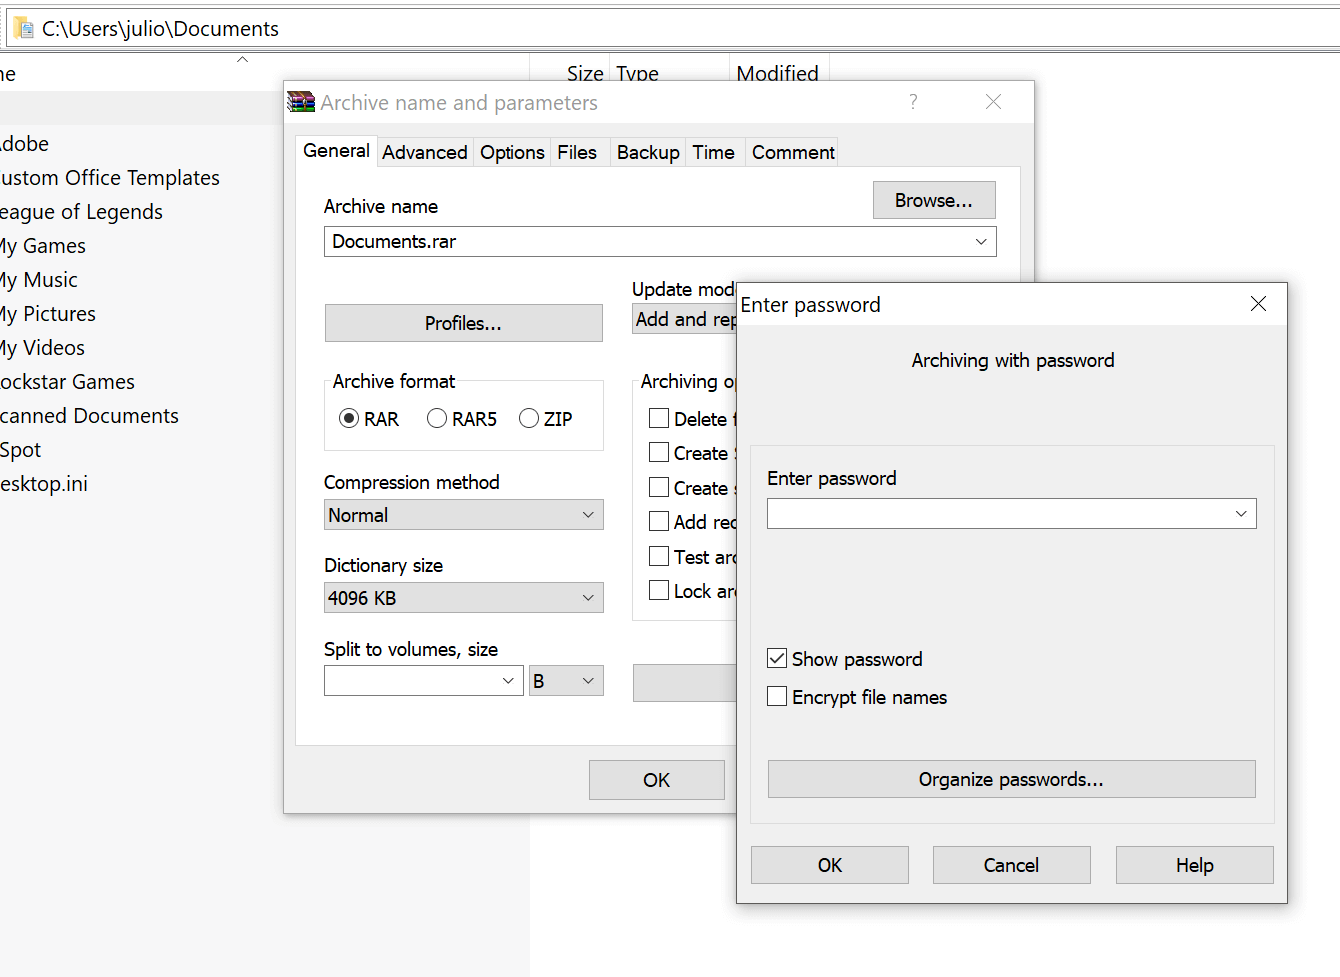
Password-protect files A simple way to lock down access to certain files is to create an encrypted archive. Odds are you already have installed a copy of 7-Zip, WinRAR, or The Unarchiver (Mac) or some equivalent. Create a new archive, select to encrypt its contents and password protect them.
Undo everywhere to fix those little mistakes Did you know you can undo almost any action? Ctrl + Z is the ultimate hot key, and for sure you knew about it already, however note that undo doesn’t just apply to typing. If you accidentally delete or move a file, you can hit Ctrl + Z to bring it right back to where it was (Ctrl + Y will redo whatever you undid).
YouTube keyboard shortcuts If you thought using the spacebar to pause a YouTube video was effective (except when focus is elsewhere and it doesn’t work), instead try using K for pausing, while J and L will step backward/forward 10 seconds. M works for mute. Super handy.
Find your Wi-Fi password In Windows, go to the “Network and Sharing Center.” Right click on the Wi-Fi network connection icon > Wireless Properties. Click on Show Characters box to show your Wi-Fi password.
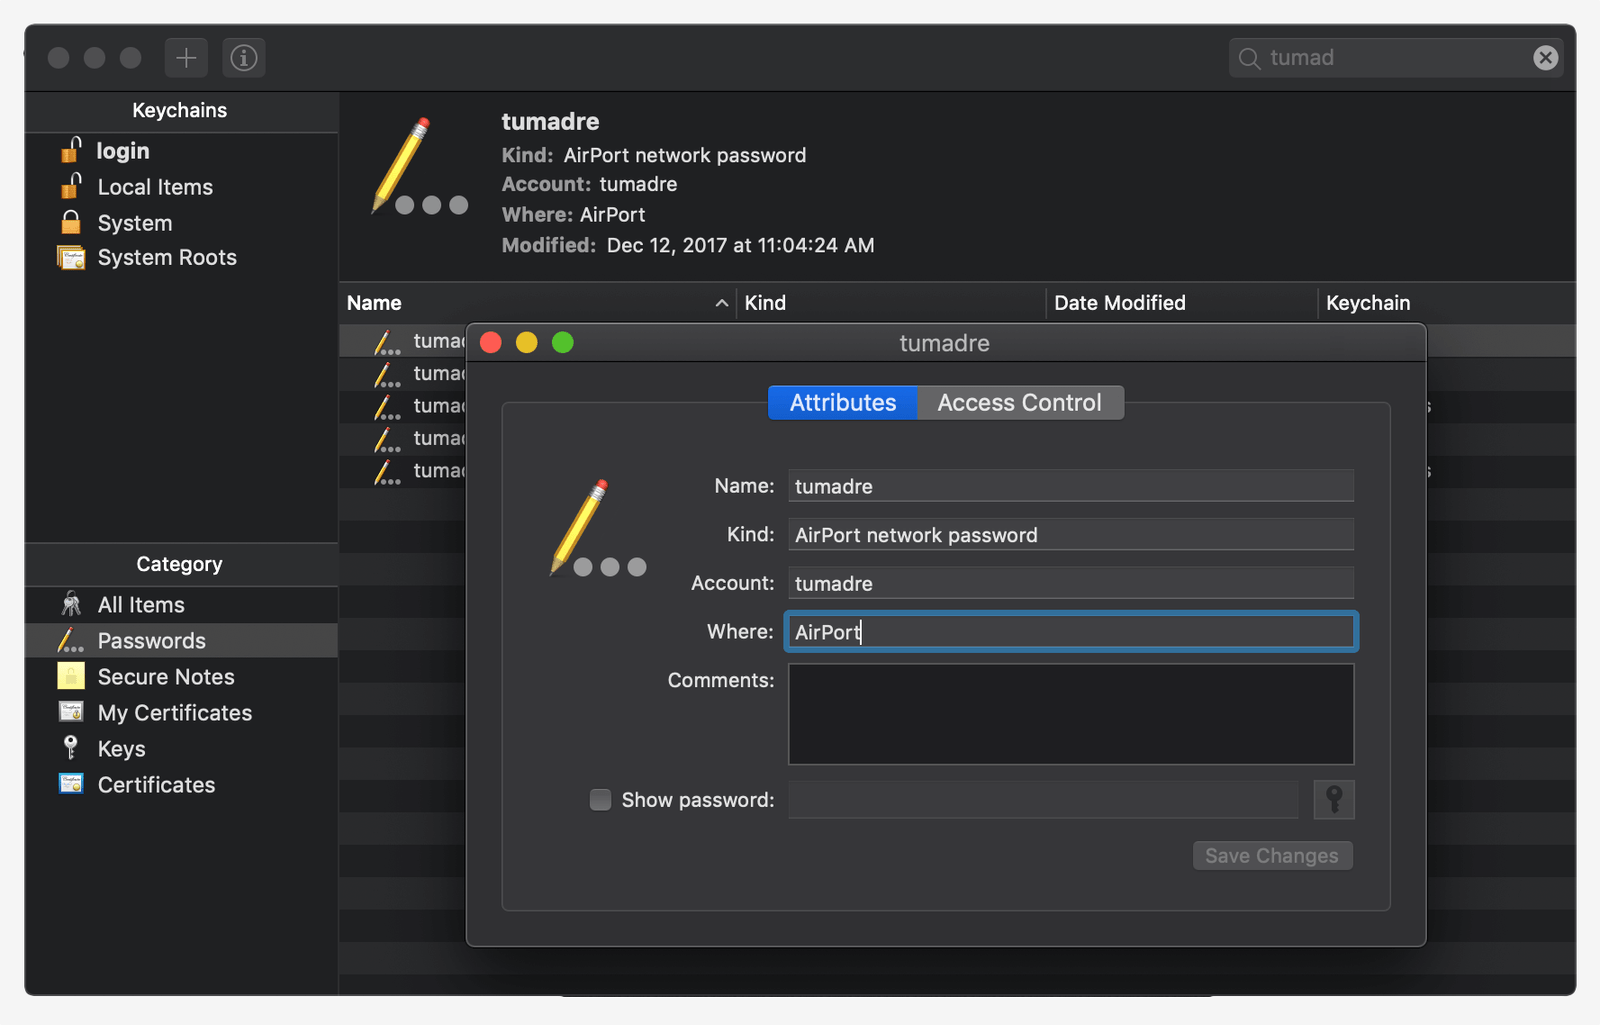
In macOS all passwords are stored in the Keychain app. Use Spotlight to find “Keychain Access.” Open the app and find your Wi-Fi network name in the list of saved credentials. Double click it and then click the box to show your password (it will require your OS level password).
Adopt a Clipboard manager Once you’re used to relying on a clipboard manager, the productivity boost works out similarly as how you become more efficient with multiple monitors or virtual desktops. We have an article dedicated to this, but in short, for Windows try ClipClip. For macOS use Flycut.
Screenshot like you mean it Simply hitting print screen on your keyboard is the easiest way to capture a screenshot. But Windows and macOS provide several other ways to screenshot, many of which are better options. But then, there’s grabbing a screenshot and annotating. We love Monosnap for doing just that thanks to its simplicity, speed, and cross-platform support.
Grab a photo from your phone How often have you found yourself wanting to take a picture and move that immediately to your workflow in your PC.
Mac users Apple simplified this for macOS/iPhone owners with Continuity Camera. In any supported app, simply go to the top menu: select Edit > Insert From Your iPhone or iPad > “Take Photo” or “Scan Document.” This will activate the camera on your iPhone, take a photo and it will automatically show up on your desktop.
Windows Microsoft developed a side project to do the same with iOS and Android phones, though it’s unfortunately not well maintained. Two good alternatives are AirDroid and Portal, or simply sync with Dropbox or Google Photos.
Windows Power User Menu You can open a quick list of common power user destinations in Windows by right clicking the bottom left of the start button on Windows 8 and 10 which opens a context menu with shortcuts to power options, the event viewer, device manager and so on. This menu is also accessible by pressing the Windows key + X.
Easily extract images from a Word (.docx) file Change the file name from .docx to .zip and open the file. The pictures will be in one of the directories.
Enable ‘Night Mode’ on all your devices If you often work at night or simply like to read on a screen before going to sleep, this can be a game changer. We recommend using F.lux on both Mac and Windows, although both operating systems have some support for this already built-in. Same goes for your mobile devices.
Find/delete large files wasting space A handy tool called Space Sniffer can be used to easily find which files and folders are taking up the most space on your drive. From there, you can delete them and open up a ton of storage space. Other Windows alternatives (free) include WinDirStat and TreeSize. On macOS you can use Finder or Siri to find large files with no third party app, but we like to use GrandPerspective.

Delete the Windows.old folder. If you have plenty of free space and don’t mind the untidiness, you can simply ignore the folder and it should be deleted automatically 30 days after the update. But if you are strapped for storage space, you can use Windows’ own tools to remove it with ease.
Command prompt here In the Windows File Explorer, type “cmd” into the address bar and it will open the command prompt in that directory.
Reduce the number of programs running at startup If your PC is taking too long to boot, it’s probably because you have far too many programs running at startup. It’s easy to reduce these and it will make your PC launch noticeably faster. Make sure you research what you are turning off as some processes might be needed by third party programs you have installed.
Windows: Open the task manager (Ctrl + Shift + Esc) and head to the startup tab to configure what programs you want to launch with your system.
Windows 7 and prior: Open run (Windows key + R) and enter msconfig to access a window with a similar startup section.
macOS: Go to System Preferences > Users & Groups > Select your user and click on the Login Items tab. You can remove or hide startup applications from here.
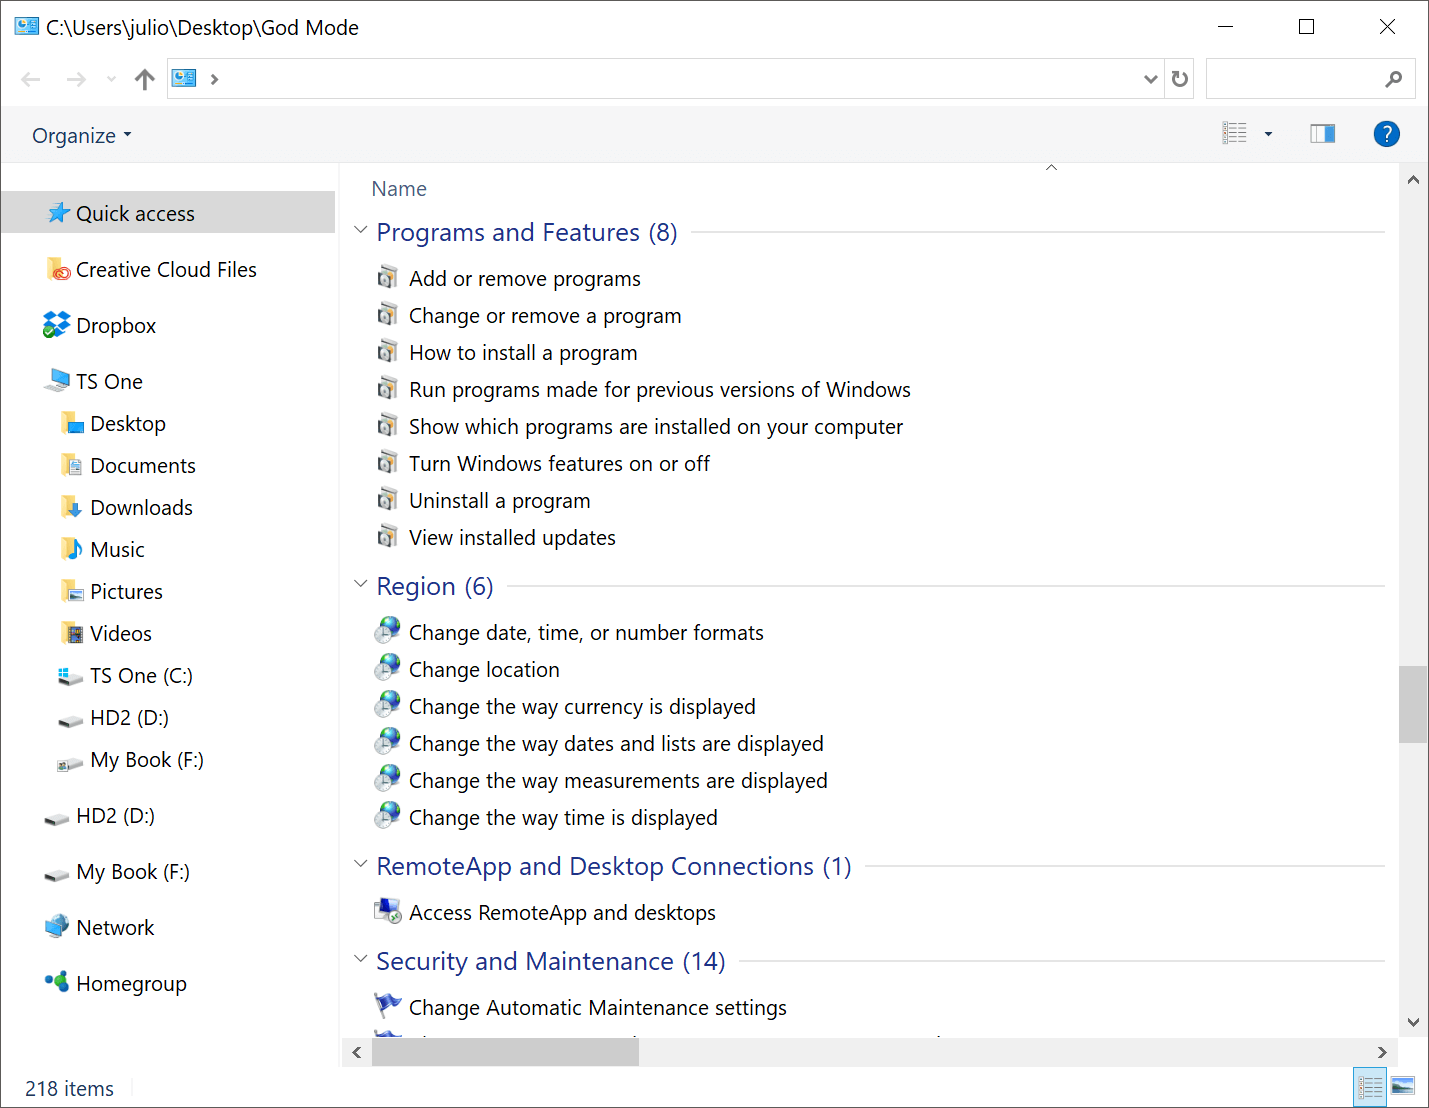
Windows hidden “god mode” folder Windows offers a centralized Control Panel for all of the OS settings, making it easy for users to tweak everything from desktop background to setting up a VPN. To enter this mode, create a new folder with this exact name (copy and paste it): God Mode.{ED7BA470-8E54-465E-825C-99712043E01C}. The folder icon will change to a Control Panel-style icon, and you will be able to jump in and change all kinds of settings.
Typing Tricks
Paste the plain text of what was copied When you copy text from any source, programs will usually include any formatting that comes with it. To paste this as plain text, press Ctrl + Shift + V instead of the standard Ctrl + V, and the system will paste unformatted text. This also works on Mac: Cmd + Shift + V.
Note that many but not all programs follow this parameter, particularly Microsoft programs like Word or Outlook don’t, which is annoying. There are a few alternatives that go beyond copying and pasting in Notepad: 1) Ctrl + Alt + V will show a ‘paste special’ dialog box. 2) Ctrl + Spacebar will remove formatting in already pasted text. 3) Download Puretext and choose a hotkey to always paste plain text with it.
Delete an entire word Instead of deleting a single letter, pressing Ctrl + Backspace will delete the entire word behind the cursor. This makes deleting text quicker if you screw up a whole word.
Move cursor to beginning of the next or previous word Moving the cursor around manually while typing is a great way to make your work take longer than it needs to. To speed up the process, move the cursor around with keyboard shortcuts. To move it to the beginning of the previous word, use Ctrl + Left Arrow. To move it to the beginning of the next word, use Ctrl + Right Arrow. In macOS you can accomplish the same using the Option key. To select words/paragraphs as you’re going, hold Shift + Ctrl + Arrow (up or down will select entire bodies of text).
Emoji keyboard If you’re addicted to using emoji, know desktop OS support them natively just like mobiles do. On Windows press the Windows Key + . (period) and on macOS Cmd + Control + Spacebar. An Emoji panel will appear so you can carry on as usual using all the expressions you want.
Making sub and superscript text If you need to make sub or superscript text (think exponents for superscript), press Ctrl + = for subscript and Ctrl + Shift + = for superscript.
Use Windows’ character map to identify and create foreign symbols Search the Start menu for “character map” and you should find a utility that lets you copy every character imaginable and even provides an Alt + Numpad code for later use. For example, the euro sign (€) can be made with Alt + 0128.
Keyboard Shortcuts
Open the task manager directly If you want to bypass the interrupt that happens when pressing Ctrl + Alt + Del and jump right to the task manager, hitting Ctrl + Shift + Esc will launch it directly.
Use Spotlight Windows built-in search is not useless, but it certainly is unreliable and slow. macOS’ Spotlight on the other hand is brilliant. Hit Cmd + Spacebar to open an app by typing just the first 2-3 letters of its name, search for files, or even do calculations.
Interrupt all processes Ctrl + Alt + Delete used to be a common PC shortcut, and one almost all power users are familiar with. The important thing to note is that it interrupts all processes, including the one that is bogging down your system, which can mean the difference between needing to restart or not. In macOS, you can also summon the Force Quit dialog box by using Cmd + Shift + Esc.
Cycle through open windows Pressing Alt + Tab allows you to cycle through currently open windows (Alt + Shift + Tab will cycle backwards). This makes switching back and forth between running processes quick and painless. In macOS the shortcut is Cmd + Tab.
Launch programs with your own hotkeys Right click the shortcut to any application in Windows, head into the properties and in the shortcut tab you should see a “shortcut key” field where you can type your preferred launch combo. Also of note, if you click the “advanced” options in the shortcut tab, you can set it to run as an Administrator, which is particularly useful for creating a shortcut to an elevated Command Prompt. This could be set to launch with the keys Ctrl + Alt + Numpad 1 for example.

Close the current program Typing Alt + F4 will close the program that is running. This is useful as it saves you time mousing over the “X” and clicking. People will often use this as a joke, telling you to press Alt + F4 to fix a problem. Don’t fall for it unless you want to close what you are doing.
Minimize all windows Sometimes you have a bunch of stuff running, and you want it all to go away so you can get to the desktop. Simply pressing Windows key + D will minimize everything you have up, which will save you some time pressing the minimize button for each window. It should be noted that Windows + M offers similar functionality, but there is no undoing, so Windows + D is the more favorable approach. In macOS we favor leveraging the power of Mission Control to handle virtual desktops, switching between apps, and peaking at your desktop beautifully.
You can use the menu key on a keyboard to right click Not every keyboard has the key (shown above), but many do. Pressing the button will right click whatever you have in focus/selected in Windows.
Close the current window/tab Stick of moving all the way to that X button? Press Ctrl + W and the current window will close. (Don’t do it now, or you will miss the rest of the tricks!)
Bring up the system information window This is so much quicker than digging this out the traditional way… Just press Windows + Pause/Break and the System Information panel will be ready to go. This might be the only use for the Pause/Break key you will ever find, so enjoy it!
Use your keyboard to launch programs on the Windows taskbar Tapping the Windows key + the number that corresponds to the position of the program is a quick way to open them. For instance if Chrome were the second icon on your taskbar and that’s what you wanted to open, you’d hit Windows key + 2.
Use your keyboard to navigate system tray icons Tapping the Windows key + B will automatically select the system tray area at which point you just have to highlight something with the arrow keys and hit enter to open it.
Enable copy and paste in the Windows command prompt While you’re tinkering with the command prompt shortcut, if you right click it > head to Properties > Options > and check the box next to “QuickEdit mode” you will be able to select text with left click, copy with enter and paste with right click.
Web Browsing Tricks
Jump to address bar There are a number of ways to jump right to the address bar from anywhere in browser. Pressing Ctrl + L, F6, and Alt + D all accomplish this goal.
Automatically add www. and .com to a URL You can shave off a couple of seconds typing in a URL by simply click Ctrl + Enter after you type the name of the site. Need .net instead of .com? Press Ctrl + Shift + Enter instead.
Cycle through open tabs Pressing Ctrl + Tab while in a browser will flip between each one (Ctrl + Shift + Tab to go backwards). This can be much faster than moving the mouse and clicking on a tab. Ctrl + Num (1, 2, 3, 4, n..) will also take you to certain tab in that numeric order. Ctrl + 9 always brings you to the very last tab, even if it’s beyond the ninth one.
Scroll through pages with the spacebar Tapping the spacebar on a website will scroll down in full page chunks and hitting shift + space will take you back up.
Instant image search (Chrome only) If you hold down the “S” key and right click on an image, it will open an image search on a new tab.
Use private browsing The uses for not having cookies and history saved are obvious for certain activities, you know, like shopping for gifts on a shared computer (of course!). Pressing Ctrl + Shift + N will launch a new private in Chrome, Ctrl + Shift + P will do it in Firefox and Internet Explorer.

Convert your browser into a notepad Type this into the address bar and you can write notes. Alternatively, while not as fast. Use Google Keep or Gmail’s compose mail to write notes and have those saved on the cloud as you type and go.
Icon-only bookmarks on your toolbar You can delete the name of your bookmarks leaving only the icon so they take up less space on the toolbar. In Chrome: right click the bookmark > edit > delete the name and save.
Use the scroll wheel Put your middle mouse button to use by clicking on links to automatically open them in a new tab/window. Also if you use the scroll wheel button on a tab, it will close it.
Copy links quicker Right click the link like usual but tap E on your keyboard to copy the link.
Make content editable Bring up the console on Chrome or Firefox (right click, Inspect). On the console enter the command document.designMode = “on” that will let you edit any text on the screen.
Zoom In, Reset Zoom Use the browser magnifier to adjust a website for more comfortable reading. Ctrl/Cmd + (plus/minus sign) does the trick. To reset to the default zoom level use Ctrl + 0.
File Management Tricks
Rename a file quickly Right-clicking and selecting rename is not very efficient. Instead press F2 while a file is selected to change its name. To alter the name of another file, type Tab without deselecting the current file. On Macs, hitting Enter will rename (which may sound counter-intuitive to Windows users) while Cmd + O is used to open.
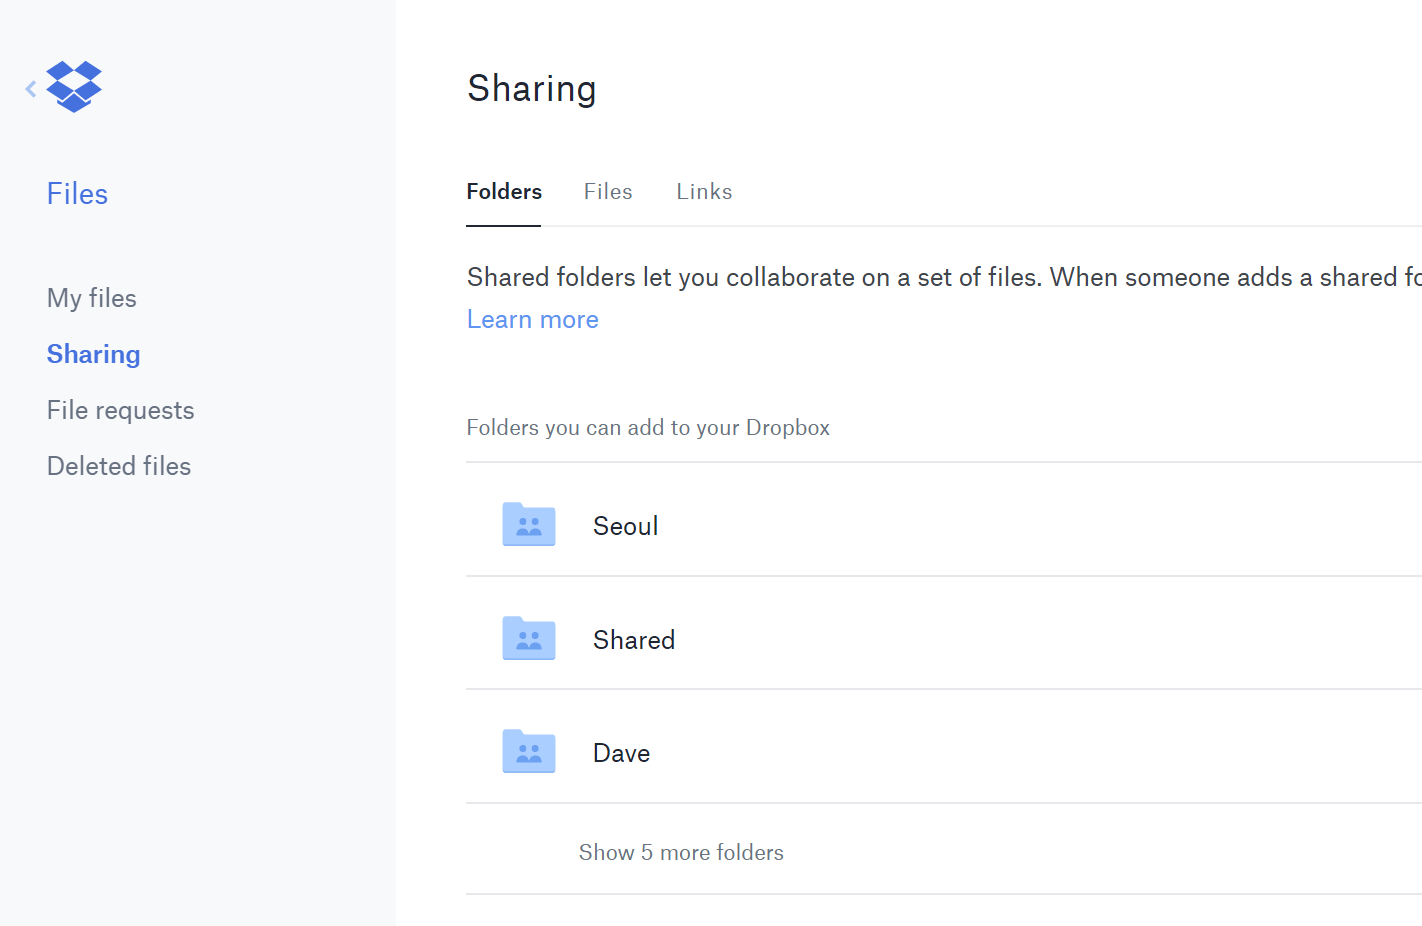
Cloud backup important files If you’re working on a critical project, make sure you aren’t backing up locally only. Services like Dropbox, Google Drive, or any of the other popular cloud storage solutions will do the legwork for you in the background. Of course, you can also throw the files on a thumb drive or external HDD to be extra safe, but backing up to the cloud can be done seamlessly.
Rename files sequentially in Windows or Mac You actually don’t need to download any programs to perform a batch file rename. Instead, you can select all the files you want to change, right-click the first one in the list, select rename (or use F2), and type in the name. This will automatically change all the other files with the same root name with a suffix: (1), (2), and so on.
On Mac, you can do something similar. Select the files, then right click and an option to rename the whole batch as a series will show up.
Select multiple files using the keyboard To select a bunch of files using your keyboard, you can press Shift + Down Arrow to select a single file or Shift + Page Down to select a large group of files at one time. Ctrl + A will select everything.
Right click drag files and folders in Windows And you’ll be presented with a context menu containing options to move, copy, zip or create a shortcut.
Security Tips
Lock your computer if you get up Sick of your “friends” going onto your computer at work or home and posting things on your Facebook/Twitter page on your behalf? It’s certainly an annoyance, but an easy one to prevent.
Windows + L will lock your system right away, requiring a password (if you’ve set one) to log in again.
On macOS use Cmd + Option + Power to log off. On the latest revision of macOS (High Sierra) a quicker option to simply lock the screen was added which works using the shortcut Cmd + Ctrl + Q.
Scan suspicious files with VirusTotal If you’re worried about a file being infected, you can upload it to VirusTotal to have it checked by a few dozen antivirus engines from the cloud. Often times someone has already uploaded the same file, sparing you the wait.
See who is logged on to your router Software such as Wireless Network Watcher makes this particularly easy and even has alarms for when someone new appears. You can also do this by logging into your router (common router IP addresses) and checking for a list of wireless clients which should display the name of the device, its currently assigned IP address and its MAC address.
Permanently remove deleted data so software such as Recuva can’t undelete files/folders Open a command prompt and enter cipher /w:C: to wipe deleted files from your C: drive (change the letter to target a different drive or folder). If you need to go the extra mile and use a file shredder program, check out Eraser (Windows) and FileShredder (Mac).
Read installers Even major programs can install toolbars and other unwanted pieces of software during installation. Take a few seconds to read each step to make sure you are not agreeing to install something other than the program you were actually seeking. Far too often people just push next over and over, and end up with a browser covered in various search bars that just aren’t needed. In the worst of scenarios, these can have nefarious intentions.
Run programs on an infected PC Malware may prevent a computer from running certain programs. Changing the name of the .exe file can often override this. If that doesn’t work, changing the extension to .com is another useful alternative, and the program will still be able to run despite the extension change.
Other Third-Party App Tricks
Steam: Move games to another drive or partition Software such as Steam Mover used to be required for this process and although these third-party solutions should still work, Steam now provides the ability to store games on multiple drives:
Go to Steam > Settings > Downloads > Steam Library Folders, make a new Steam library folder on the new drive, then right click on an already installed game in your Steam library > Properties > Local Files tab > Move install folder… > Choose the directory > Move folder
Repeat last command in Excel Pressing F4 in Excel repeats the last command. A great example we found on Reddit: if you select a cell and highlight it yellow, you can then highlight any other selected cells yellow by pressing F4.
Use Windows’ Problem Steps Recorder This handy tool automatically records any mouse clicks and takes screenshots for you. If you need tech assistance with your computer, go to Start and search for “steps recorder”. Use the tool and by the time you are finished, you can send this information, neatly compiled automatically, to the person helping you with the issue. It will make the process of finding the problem much easier for them, which means you will be able to get your system up and running faster.
VLC: Fix unsynced audio and subtitles In the popular media player VLC, if your audio loses sync with the video or subtitles, there is an easy way to fix this. Simply pressing J or K will move the audio forward or backwards. Similarly, to sync the subtitles you can press H or G.
Expand your text to full page width in Microsoft Word We don’t see this feature used quite enough and by default Word leaves a lot of unused space toward the margins. Head to View > Zoom > and choose Text Width > OK. Now whatever you’re writing should fill out most of the Word page.